Concise ART-icles
Written and Illustrated by: Ann B.S.
Understanding Basic Perspective in One Seating
Oct 18, 2019A camera is a perfect replica of the human eye in capturing an image. Since its invention, our viewing experience was never the same. It helped us study what we see.
Our eyes can see depth and solidity. It is appears 3D! In a more technical way of explaining elevation: in the x-y plane, the face of an object that lies flat on these axes is considered 2D (2-dimensional). CAD (computer-aided design) users are full of it. The undistorted face of one side of a solid object is an ELEVATION. Where is Z? From the drawing below, Z is pointing towards you.
We cannot see objects as ELEVATION in the real world. The amount of distortion our eyes can perceive is PERSPECTIVE. If you are walking or driving on the road, the two parallel curbs converge at a certain point. The point where these parallel lines meet is the vanishing point (VP). Below is an example of a one-point Perspective.
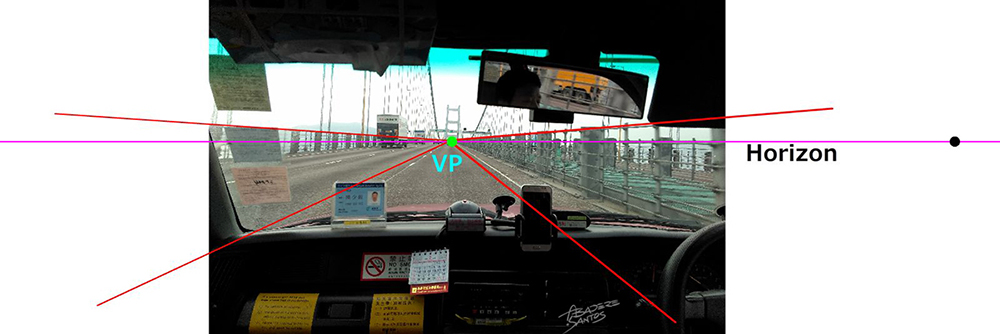
The vanishing points are in line with the horizon. And the horizon is always at a person’s eye level. When you sit or stand or go to an apex of a building, the horizon remains right at eye level. The point where the person stands is called the station point. OBSERVE the figure above.
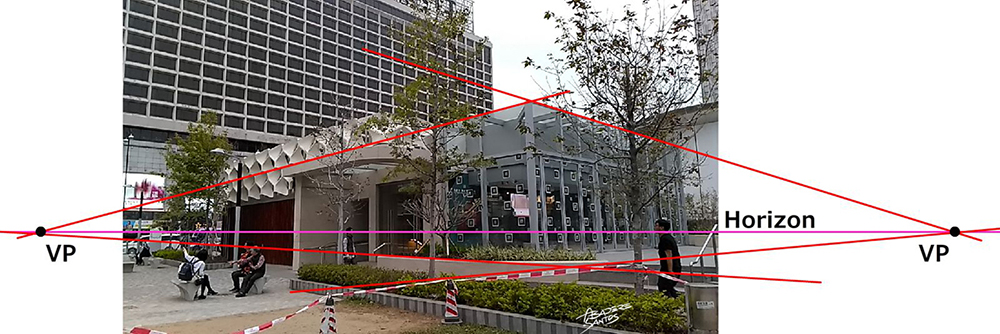
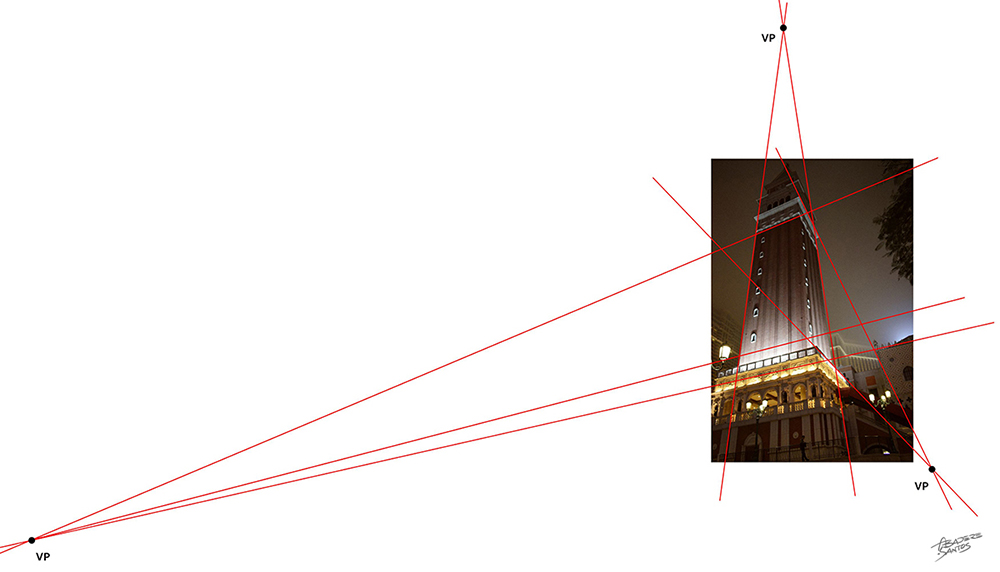
Above image: The scene has three (3) or more vanishing points. The third vanishing point gets located by drawing a straight line perpendicular to the x-horizon line. The vanishing points could be multiple, which is also common in aerial views.
Anyone who wants to play geek with perspective must find the easiest way to integrate it in an illustration; otherwise, it will eat up a lot of time. And there are techniques to be posted in the future.
OLD SCHOOL DRAFTING OF PERSPECTIVE:
Now, knowing that perspective is structured. Applying it involves manual setting up a large sheet of paper, generous space, and meticulous checking of construction lines; otherwise, the drawing will look lopsided and imprecise. Lines might miss the point.
The easiest way to do perfect perspective drawing is by standing at a plain and unobstructed glass window, seeing the surroundings, as it is. Assume you are looking at a landscape scenery framed by this window opening. If you try to trace what you exactly see and draw on the glass itself, the drawing will surely be at an accurate delineation.
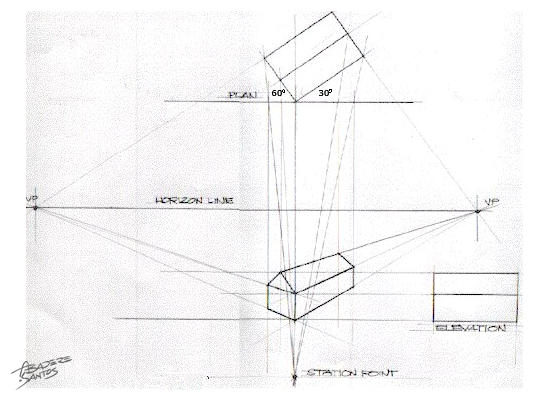
Here is a more technical interpretation of the perspective drawing done on a drafting table. The drawing is a 2-point perspective with vanishing points.
You can try copying the illustration (below) by setting up about 15"x 20" tracing sheet or plain paper on a table, tape it, and get your rulers or T-square. No need to scale the measurements of the plan if you want it fast, but make sure it fits the paper.
In this two-point perspective, the plan gets oriented 30 degrees and 60 degrees (left side). Meanwhile, the side elevation is necessary to complete the plot. The station point can be adjusted, which would change how the finished perspective looks, the moment it is projected from the line bisecting the plan.
If the plan and elevation are scaled, the more proportioned and meaningful the resulting perspective would be.
Doing this drafting method of perspective drawing is old-school. 3d soft swept off this linear method.
THE PRACTICAL SIDE:
Back to my general idea of expounding on solid drawings, all you have to do is apply it in practical freehand drawing. There are several techniques to achieve solidity in drawing.
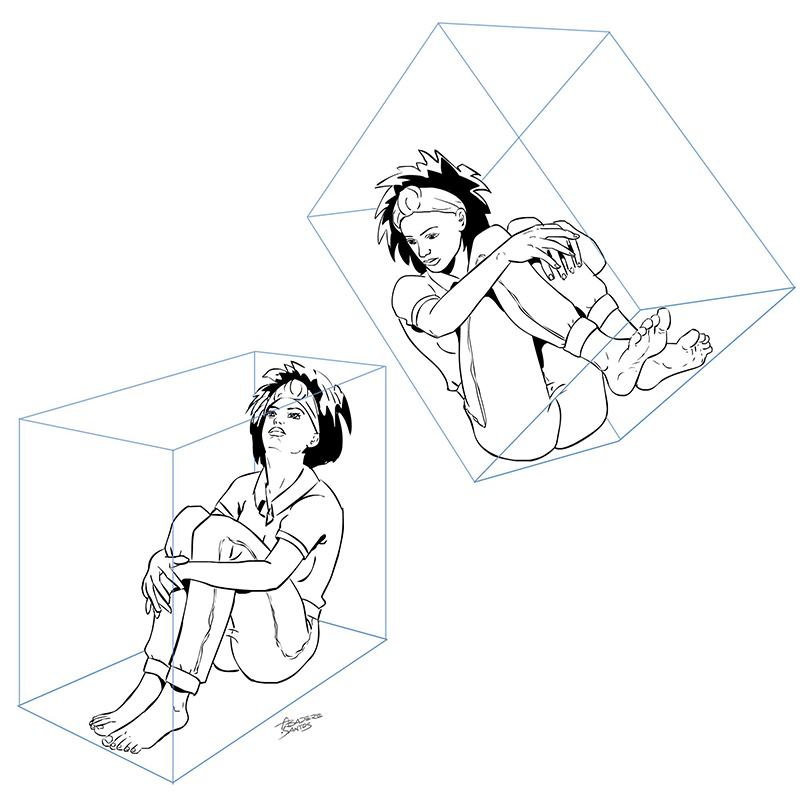
Draw in a box.
Yes, why not try to put drawings in solid cubes? Assume your cubes are at a correct perspective. Anything placed inside it will automatically be in 'perspective.' Below are figures drawn at different angles: looking up and looking down.
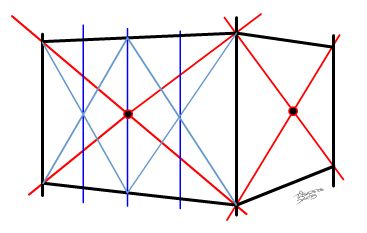
Centering techniques:
For symmetry, try this: Draw an x to find the center of a plane. Align all the X's that you need to find centers.
See the image here. >>>
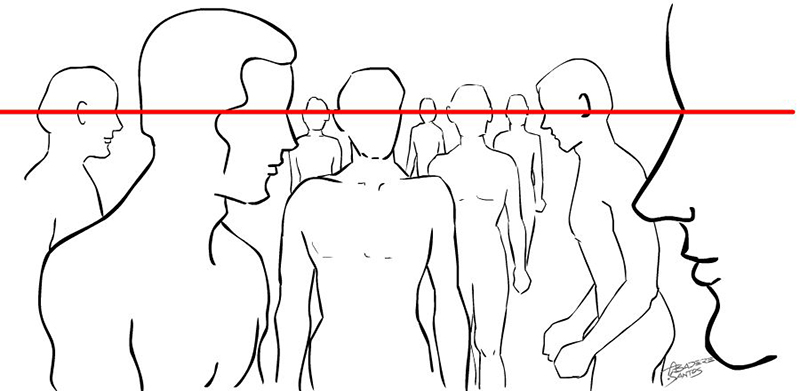
Eye level @ horizon
In drawing a crowd, notice that all the eyes fall at a common eye level. Just adjust the In drawing a crowd, notice that all the eyes fall at the same eye level. Just adjust the proportion of the head depending on where each stands. They appear far, yet the eyes align with the horizon for this setup. See the figure below:
THE POINT IS:
While perspective drawing is linear and more applicable in drafting, exploration of drawing pretty much demands it, especially on backdrops or background. Understanding it will give visual logic to a drawing. Everything about solidity, surface bump, increment of distance are all part of knowing perspective. One must see through and draw how it exactly appears and NOT what one mistakenly thinks it looks.
A strong foundation in PERSPECTIVE will help you realize natural ways to see distortions: the parallel lines converge, the diminished of colors at a distance -- highlights, shadows, and angles. As the object gets far from the line of sight, it becomes smaller until it appears insignificant. The color becomes lighter, and the outlines indistinct.
Be easy with yourself on this!